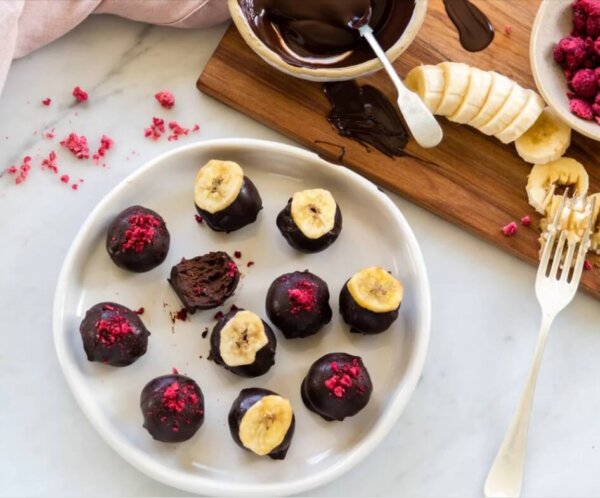
Close Dark Chocolate Banana Raspberry Truffles Ingredients ✓ 250g dairy free dark chocolate i ideally no darker than 72% ✓ 1 ripe All Good banana ✓ ¼ cup All Good oat milk ✓ 1 tablespoon coconut oil ✓ 1/2 cup freeze-dried raspberry pieces ✓ Dried Banana pieces Method #1 Place the chocolate in a heatproof bowl over a pot of simmering water (do not let the bowl touch the water) and stir until smooth. #2 Peel and then break the banana into chunks. Place in a food processort along with the oat milk. Blitz until as smooth as possible. Add the melted chocolate and the coconut oil. Run the machine for a minute or so. Stir through the freeze-dried raspberry pieces. #3 Spoon into a shallow bowl, smooth out the top and place in the fridge for 1 - 2 hours until set enough to roll into balls. If you leave it too long and it becomes too hard, simply leave at room temperature for 15 minutes. #4 Roll heaped teaspoons of chocolate mixture into balls. Place on a plate lined with baking paper in the fridge to firm up. #5 Coating: Dip in melted Dark chocolate (melt using the method above) and then top with a banana chip while still soft or sprinkle with freeze dried raspberry powder once set. Skewers can be helpful to use when dunking the truffle into the melted chocolate
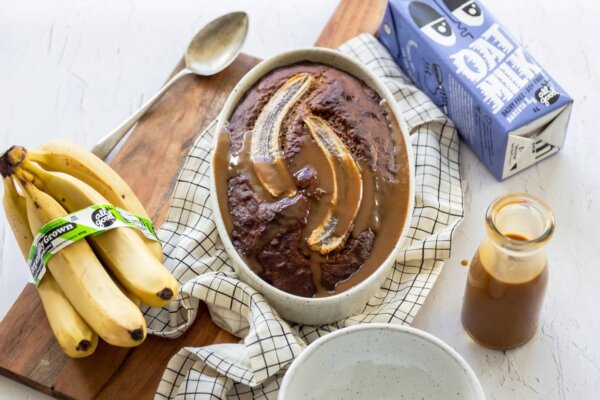
Close Tasty! Sticky Date & Banana Pudding Ingredients ✓ 2 cups dried baking dates ✓ 1 cup water ✓ 1 teaspoon baking soda ✓ 1 ripe All Good Banana ✓ ½ cup coconut sugar ✓ 1 3/4 cups flour ✓ 2 teaspoons baking powder ✓ ½ teaspoon ground cinnamon i optional ✓ 1 teaspoon ground ginger i optional ✓ ½ cup All Good Barista Blend Oat Milk ✓ ½ cup melted coconut oil ✓ 2 teaspoons good quality vanilla essence ✓ Additional All Good Banana to top the pudding Method #1 Preheat oven to 180 degrees. #2 Place the dates and water in a small saucepan. Bring water to a boil. Turn off heat, stir through the baking soda and leave to soften for 10 or 15 minutes. #3 Place the dates and the soaking water in a food processor. Peel the banana, break it onto chunks and add this to the food processor also. Blitz these until you have a mostly smooth paste. Add the remaining ingredients and mix only as much as is needed to bring the ingredients together. Do not over mix. #4 Spoon into a well greased oven-proof dish and smooth out the top. Peel the second banana, halve lengthways and lay cut-side up on top of the batter. #5 Bake for 40-45 minutes until springy and a skewer is mostly clean when inserted. #6 Leave the pudding to sit for 15 minutes (or up to 1 hour) before serving. #7 Enjoy with vegan ice cream. #8 The ultimate cosy, rich dessert for chilly nights. Enjoy with vegan ice cream or whipped coconut cream.
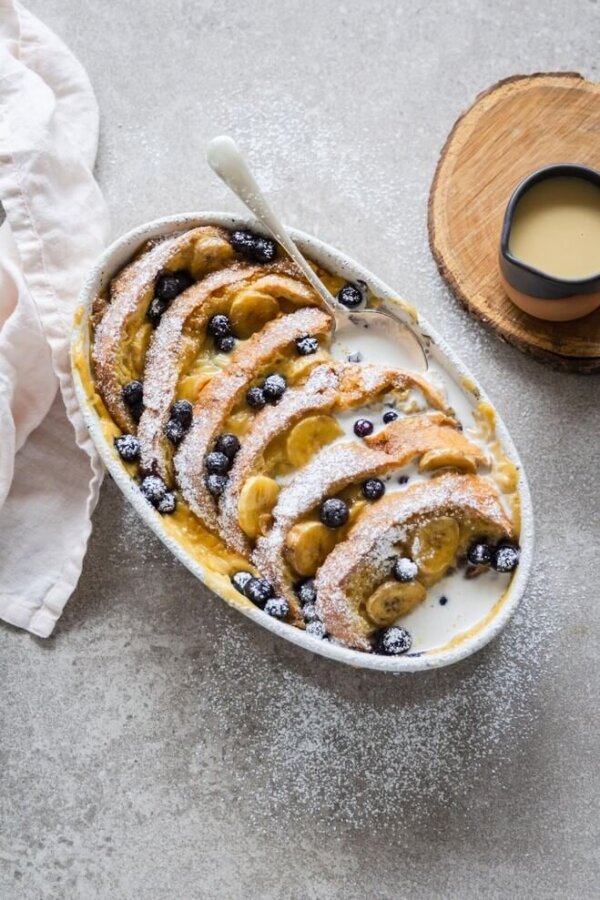
Close Banana Bread Pudding Ingredients ✓ 7-8 thick slices of bread i ideally from a rustic bakery style loaf ✓ Dairy free / vegan spread ✓ 1 large All Good Banana – peeled and sliced ✓ 1/2 cup frozen blueberries ✓ Oat Milk Custard ✓ 750ml All Good Barista Oat Milk ✓ 3 tablespoons custard powder ✓ 3 tablespoons sugar i white, brown or coconut sugar will all work ✓ 1 teaspoon vanilla essence Method #1 Preheat oven to 160 degrees Celsius. #2 Place the All Good Barista Oat Milk in a saucepan along with the custard powder and sugar. Whisk well. Put over a medium heat. Heat for approximately 5 minutes, stirring constantly, until the custard has thickened slightly and only just coats the back of the spoon. Do not allow it to boil. You want a thinner custard as it will thicken as it bakes. Stir through the vanilla and set aside. #3 Spread the bread thickly on both sides with the dairy free spread. Place bread lying diagonally, snugly together. Place the slices of banana between each layer - probably 4-5 pieces per layer. Pour the custard carefully over the bread, lifting each layer and pouring between, to ensure all the bread gets coated. Scatter the blueberries over the top, tucking a few between the layers. #4 Leave to soak for 20 minutes before putting in the oven. Bake for 25-30 minutes until bubbling.
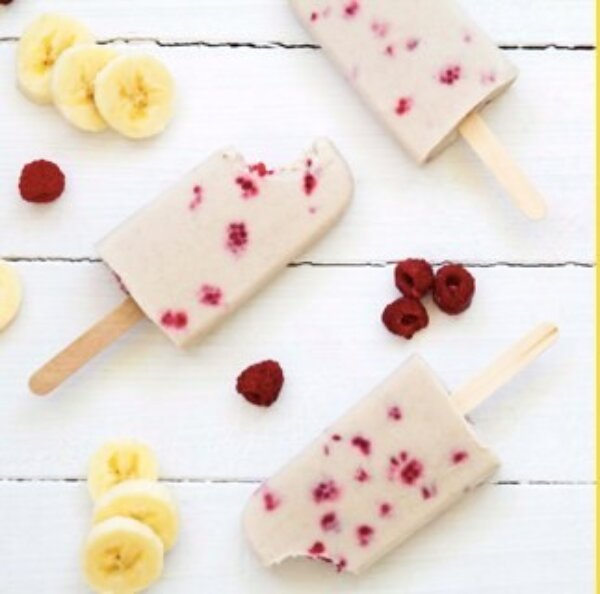
Close Yum! Banana & Raspberry Popsicles Ingredients ✓ 2 ripe All Good Fairtrade bananas ✓ 1/2 cup coconut cream ✓ 1/2 cup All Good Oat Milk ✓ 2 tablespoons honey ✓ 1 tablespoon lemon juice ✓ 1 teaspoon vanilla extract ✓ 1 cup frozen raspberries Method #1 Combine all ingredients except raspberries in a blender and blitz until smooth. #2 Fill 6 popsicles moulds until 2/3 full. Top with 5-8 raspberries (cut in half if large) and use a knife to push them down into the mould. #3 Top with liquid until full. You may have extra liquid depending on the size of your moulds. #4 Place in the freezer until solid. If using wooden sticks, set a timer for 25 minutes. At this stage the mixture should be firm enough to insert the sticks, then return to the freezer. #5 Remove from the moulds by briefly running under hot water. This will ‘shock’ the ice block into releasing.
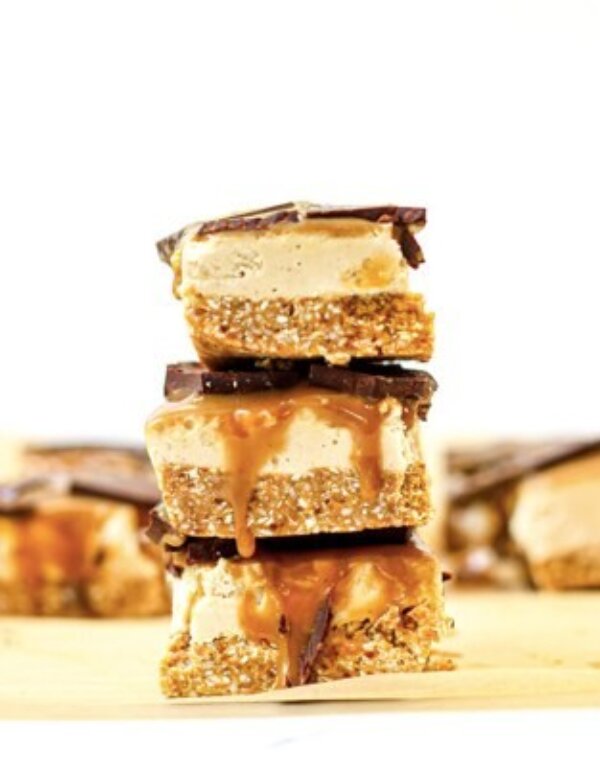
Close Plant-Based Banoffee Slice Ingredients ✓ Base ✓ 1 cup of rolled oats or almonds ✓ 1 cup of desiccated coconut ✓ 1/2 a cup of dried dates i soaked in boiling water for 10 minutes and then drained ✓ 2 tbs of coconut oil ✓ 2 tbs of nut butter i we used almond butter ✓ Pinch of sea salt ✓ Banoffee Cream ✓ 1 cup of raw cashews i soaked in boiling water for 1 hour and then drained ✓ 1 cup of our new Banoffee Coconut Yoghurt ✓ 2 tbs of maple syrup ✓ 2 tbs of coconut oil ✓ Vegan Caramel ✓ 1 cup of coconut cream ✓ 1/2 a cup of coconut sugar ✓ Chocolate Topping ✓ 100g dark chocolate i we used 85% Method #1 Line a 20cm x 20cm brownie tin with baking paper. #2 In a blender or food processor add the oats, coconut, dates, coconut oil, almond butter and salt. Blend until the mixture comes together nicely. Add the base mixture to the brownie tin and push down to create the base. Pop in the freezer to set while you make the other layers. #3 To make the vegan caramel simply add the coconut cream and coconut sugar to a small saucepan and bring to the boil. Once the mixture is boiling turn down to a medium heat and let reduce for 5 minutes or so until the caramel has thickened slightly. Pour the caramel into a bowl or glass jar and allow to cool in the fridge. #4 To make the banoffee cream layer add all of the ingredients into a high speed blender and blend until super smooth and creamy. Remove the base from the freezer and pour over the banfoffee cream layer. Pop back in the freezer to allow to set for a couple of hours. #5 After a couple of hours (or longer) you can remove the vegan caramel from the fridge and pour over the banoffee cream layer. Pop in the freezer to set for another couple of hours. #6 Melt the dark chocolate and pour over the slice and place it back in the freezer to set for another few hours. Remove from the freezer 30 minutes or so before serving so it softens nicely.
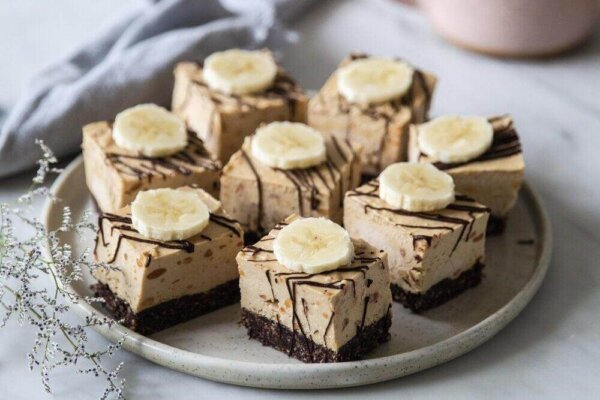
Close So good! Banana & Peanut Butter Cheesecake Bars Ingredients ✓ Base ✓ 1 cup dried dates ✓ 1 cup raw pecans ✓ 1 cup almond meal ✓ ½ cup desiccated coconut ✓ ¼ cup dark cocoa powder ✓ Pinch sea salt ✓ Filling ✓ 500 grams cream cheese i not the spreadable variety ✓ 1 cup fresh dairy cream ✓ 1 ripe banana – mashed ✓ 1 cup good quality crunchy peanut butter ✓ ¾ cup coconut sugar ✓ 1 teaspoon vanilla essence Method #1 Place the dates in a bowl and cover with boiling water. Leave to sit for 10 minutes to soften, before draining well. #2 Place the pecans, almond meal, coconut, cocoa powder and salt into a food processor. Blitz until a coarse crumb. Add the dates and process for a minute or two until well blended and the mixture sticks together when pressed between two fingers. #3 Line a 23cm square baking dish* with clingfilm or a large beeswax wrap. Press the mixture into the dish very firmly and evenly. Spend some time doing this. Getting it nice and even will ensure a good end result. Use the back of a spoon to smooth it all out. Place in the freezer while you make the filling. #4 Clean out the food processor bowl. Place all the filling ingredients into it and process on a low-medium speed for a few minutes until completely mixed. #5 Spoon filling onto the base. Use a spatula or back of a spoon to flatten the top. #6 Place in the freezer to harden for 2 hours. #7 Use a sharp knife dipped in hot water to cut the cheesecake into tidy squares. Place on a chopping board. #8 Melt the dark chocolate using a double boiler. Drizzle over the cheesecake slices and place them back into the freezer immediately. #9 This dessert must be stored in the freezer. It will last up to 2 months in an airtight container. Remove from the freezer 10 minutes before serving. #10 *slightly smaller or larger tins will also work. The thickness of the base and filling will just change accordingly.
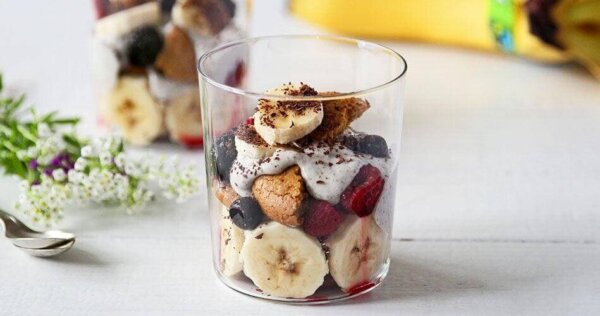
Close Vegan ‘Cheats’ Trifle w/ Banana & Berries Ingredients ✓ 2 cans full-fat coconut cream ✓ 3 tablespoons chia seeds ✓ 1 teaspoons vanilla essence ✓ 4 tablespoons maple syrup ✓ 2 All Good bananas – peeled and sliced ✓ Juice of 1 lemon ✓ 16 – 20 vegan cookies i I used a ginger cookie but any flavour will work ✓ 2 cups berries i fresh or thawed if using frozen ✓ To serve: grated dark chocolate Method #1 Place the coconut cream, chia seeds, vanilla essence and maple syrup in a blender. Blitz until as smooth as possible. Place in the fridge for 30-60 minutes to thicken. #2 Just before assembling the dessert, toss the banana slices gently in the lemon juice to prevent browning. Drain excess juice away. #3 To Assemble: Use 4 small dishes or glasses. I like glasses as they show the layers. Break each cookie into 2-4 pieces (this does not have to be perfect!). Place a few pieces in the bottom of each glass. Place banana slices around the base of the glass. Top cookies with a few berries and a generous dollop of coconut chia cream. Repeat these layers until you’ve filled the glasses. Top with a banana slice, a berry. Place in the fridge for at least 1 hour (or up to 3 hours). Top with grated dark chocolate just before serving.
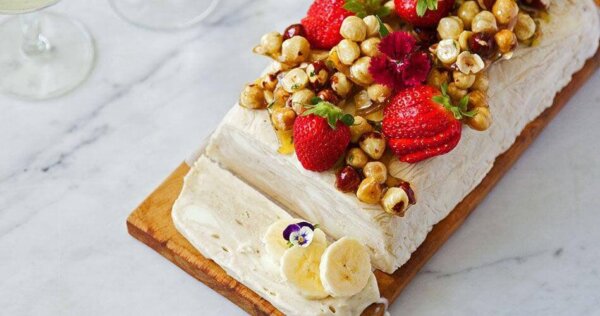
Close Delish! Banana Semifreddo w/ Honey & Thyme Hazelnuts Ingredients ✓ 4 eggs, separated ✓ 350ml fresh cream ✓ 2 bananas - mashed well ✓ 1 cup caster sugar ✓ 1 teaspoon vanilla paste or good quality vanilla extract ✓ Honey hazelnuts ✓ 1 ½ cups raw hazelnuts ✓ ½ cup honey ✓ 1 teaspoon fresh thyme leaves Method #1 Semifreddo: Oil and then double line a loaf tin with clingfilm or baking paper. #2 Place the egg whites in one large, clean bowl. Place the cream in another and the egg yolks, mashed banana, sugar and vanilla essence in another. #3 Use an electric beater to beat the egg whites until soft peaks (Ensure the beaters are very clean – this helps the whites stiffen). #4 Whip the cream until soft peaks. #5 Beat the egg yolks, banana, sugar and vanilla together for one minute until frothy. #6 If you mix in this order you will not need to wash the electric beater in between bowls. Add the cream to the egg yolk mixture. Fold together carefully. Add the egg whites and fold in gently. #7 Pour into your prepared loaf tin and place in the freezer for at least 6 hours to set. #8 To serve: Turn semifreddo onto a plate or platter when ready to serve. (Cool your platter in the freezer for 20 minutes before hand to keep semifreddo from melting too quickly). #9 Garnish with strawberries, banana slices and the honey hazelnuts. Serve in thick slices. #10 Will keep for up to 2 months in the freezer. #11 Honey and thyme hazelnuts: Preheat oven to 120 degrees celsius. #12 Lay the hazelnuts in a single layer on an oven-proof tray. #13 Roast for 20 minutes until lightly toasted and the skins come off easily when rubbed. #14 Place the nuts inside a clean tea towel and rub vigorously together. This will remove most of the skins. Don’t worry if it’s not absolutely perfect. Discard the skins. #15 Place the nuts, honey and thyme into a small saucepan or skillet. Heat very gently until lightly bubbling. Cook for 1 minute before pouring onto a tray lined with baking paper. Leave to cook in the fridge for 1 hour. Use your hands to pull the nuts apart into small chunks.
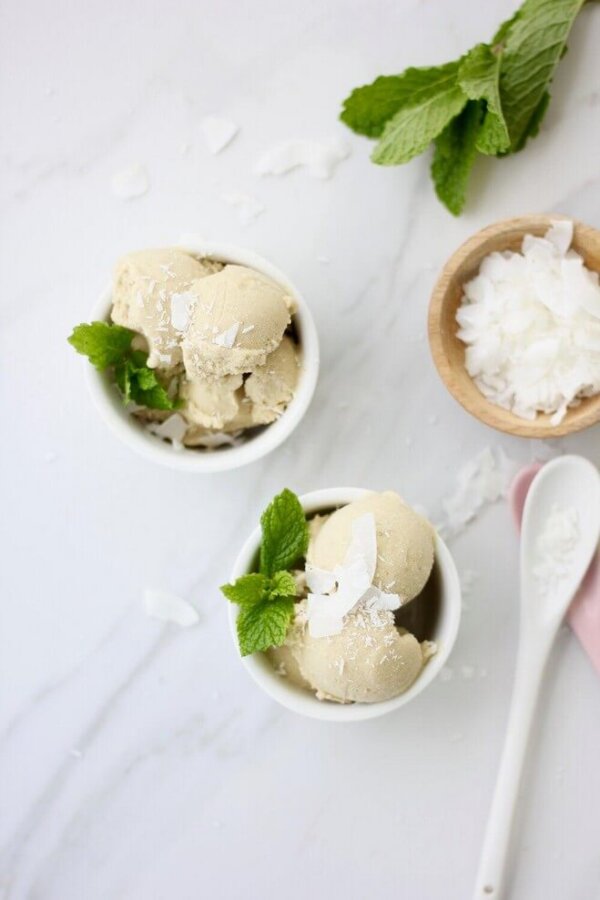
Close Banana Colada Nice Cream Ingredients ✓ 1 cup frozen pineapple ✓ 1 frozen Allgood banana ✓ 1 cup coconut cream ✓ 6 fresh mint leaves ✓ ¼ tsp turmeric, not essential but just helps boost the yellow colour ✓ 2 TBS maple syrup Method #1 Blend everything in a blender until silky smooth and transfer to a container. #2 Place in the freezer overnight to set. Enjoy!
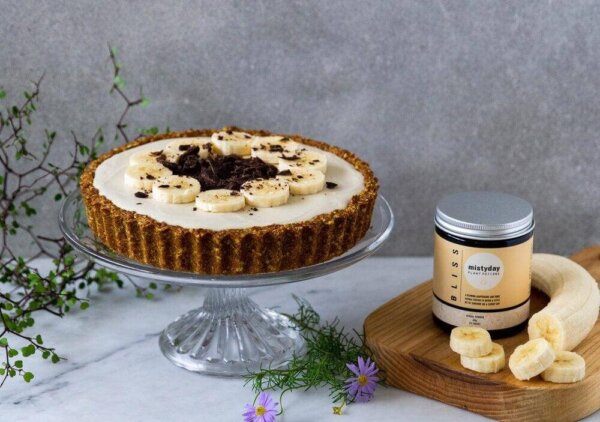
Close More please! Vegan Banoffee Tart Ingredients ✓ Base ✓ 100g dried dates ✓ 1 ¼ cups rolled oats ✓ 1 ¼ cups almond meal ✓ 1 tablespoon coconut oil ✓ 2 ½ teaspoons Misty Day Bliss powder ✓ Caramel ✓ 1 cup dried dates ✓ ¼ cup almond butter ✓ ½ cup All Good Original Oat Milk ✓ 1 teaspoon vanilla essence ✓ Pinch sea salt ✓ Filling ✓ 1 ¼ cups raw cashew nuts ✓ 3/4 cup full fat coconut cream ✓ ¼ cup coconut oil ✓ ¼ cup maple syrup ✓ 1 teaspoon vanilla essence ✓ To assemble: 2 bananas – sliced into 1 cm slices, roughly chopped dark chocolate Method #1 Base: Preheat oven to 160 degrees Celsius. #2 Place the dates into a bowl and cover with boiling water. Leave to soak for 15 minutes. Drain well. #3 Place all the base ingredients into a food processor. Run the machine until the mixture sticks together when pressed between 2 fingers. #4 Grease a 20cm round tart case very well. Press the mixture evenly and firmly into the case. Slightly wet fingers can make this easier. Use a fork to prick the bottom of the tart 3 times. #5 Bake for 15 minutes. Set aside to cool before filling. #6 Caramel: Place the dates in a bowl and cover with boiling water. Soak for 15 minutes before draining well. Use a stick blender to blitz with other ingredients until smooth. #7 Filling: Place the cashew nuts in a bowl and cover with boiling water. Leave to soak for 15 minutes. Drain well. #8 Place in a high speed blender or Nutribullet along with the other ingredients and blitz until silky smooth. Taste and adjust sweetness if desired. #9 To assemble: Pour the caramel into the base and smooth out evenly. Top with banana slices. Pour the creamy filling over the top. Place in the freezer to set for 1 hour or the fridge for 3 hours. Do not allow the tart to freeze as the banana will go slightly mushy. Just before serving, top with the remaining banana slices and the chopped chocolate #10 The completed tart will keep for 3 days in the fridge.
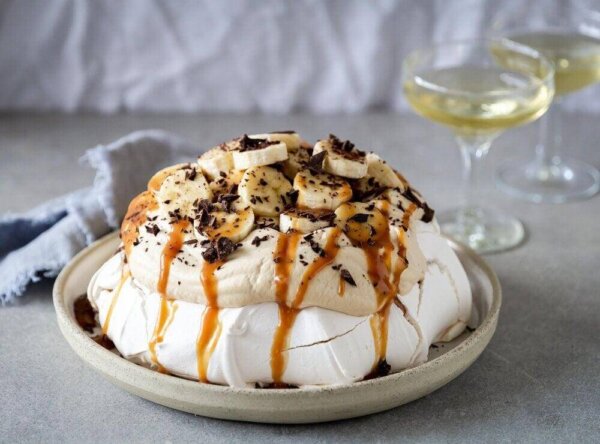
Close Banoffee Pavlova w/ Coffee Cream Ingredients ✓ Pavlova ✓ 5 free range egg whites ✓ 275g caster sugar ✓ 1 teaspoon vanilla essence ✓ 1 teaspoon white vinegar ✓ 1 ½ teaspoon cornflour ✓ Salted caramel sauce ✓ 3/4 cup cream ✓ 50 butter ✓ 1 teaspoon vanilla ✓ ¾ cup caster sugar ✓ ¼ cup boiling water ✓ 2 generous pinches flaky sea salt ✓ Coffee cream ✓ i Make this just prior to serving ✓ 350ml fresh cream ✓ 1 teaspoon vanilla essence ✓ 2 tablespoons icing sugar ✓ 1 rounded teaspoon instant coffee ✓ To assemble ✓ 2 All Good bananas – sliced ✓ Roughly chopped dark chocolate to garnish Method #1 Preheat oven to 110 degrees Celsius (not fan bake) #2 Place the eggs in a large clean bowl. This must be ceramic, glass or metal. It cannot be plastic – this is very important. #3 Use electric beaters or a stand mixer to whisk until soft peaks have formed. Start at a slow speed and build up as the egg whites become firmer. Once you have soft peaks, you can add the sugar a heaped spoonful at a time waiting about 10 seconds before you add the next spoonful. The egg whites will get glossier and stiffer as you do this. Keep whisking until you have firm peaks. #4 Add the vanilla, vinegar and cornflour. Whisk for a further minute. #5 Spoon the mixture onto an oven tray lined with baking paper. The size of your pavlova should be similar to a small dinner plate. Keep good height and swirl the top with the back of a spoon to create a slight crater (this will make topping the pavlova easier later on). Work your way around the outside of the pavlova with a large spoon sweeping upwards to create a nice shape to the sides. #6 Bake for 90 minutes. Turn off the oven, keep the door closed and leave the pavlova to cool for at least 2 hours. Store in an airtight container until ready to use. #7 Salted caramel sauce: Place the cream and butter in a small saucepan. Melt over a low heat. Add the vanilla. Set aside. #8 Place the caster sugar and water into a large saucepan over a low heat. Stir well until the sugar has dissolved. #9 Use a wet pastry brush to move any stray sugar crystals that are stuck to the side of the pot. Increase the heat slightly and do not stir the pot at all from now, though you may swirl the pan very gently occasionally to keep the heating of the sugar even. Leave the sugar to bubble until it is a light amber colour. #10 Remove from the heat and whisk it the cream and butter mixture. Do this VERY carefully as it will bubble up wildly. Add the salt and pour the caramel into a clean jar with a tight lid. Store in the fridge. #11 The caramel can be left unopened for up to 2 months in the fridge. Once opened, eat within 1 week. #12 Combine all the ingredients in a large bowl and use electric beaters to whisk until softly whipped. Do not over whip as the cream will split. #13 To assemble: Ideally remove the salted caramel sauce from the fridge 20 minutes before assembly so that it is a good drizzling consistency. Top the Pavlova with the coffee cream. You may not need all of it depending on the shape of your pavlova. #14 Drizzle generously with salted caramel sauce (again you may not need all of it). Pile high with banana slices (and a little more salted caramel if you’d like) and garnish with dark chocolate. Serve immediately.